Showing posts with label Other. Show all posts

Thursday, March 31, 2016

My Spring Staple: The Denim Jacket

Hey guys! Long time no talk! I have been M.I.A for quite a while. As many of you know, I am still a student and unfortunately, school is a priority, therefore blogging has been pushed aside. Today though, I would love to share a brand new item in my wardrobe with you! My new denim jacket!

If I am being honest with you, I haven't always loved the look of a jean jacket. I always associated them with little girls or people living in the past through their vintage jean jacket, until I actually tired one on myself. I guess the saying "Don't judge a book by it's cover" was completely true in my case, as I fell inlove with my denim jacket!

I purchased my Cropped Denim Jacket from Old Navy here in Canada for around $37. For some, this may seem pricey but I fell in instant love and understand that this is a staple that can be worn with so much, so I would get great use from it.

I originally paired it with a dress I also purchased from Old Navy. And yes, I took a "basic" changeroom selfie #noshame! :)

Throughout all of the looks, I kept the jacket unbuttoned and the sleeves loosely rolled for a more effortless look!


The second way I wore the jean jacket was with some capris leggings and a flowy t shirt blouse. Although, I love the jacket with dresses, if you have a occasion where a dress is not suitable, you could try this outfit! 
The final way I styled the denim jacket was with, of course, a dress again! This is another cotton t shirt dress from Old Navy (can you tell I love shopping there??) that I purchased a few years back. This is a great alternative to throwing a cardigan over a dress during those breezy days or chilly nights. 

Sunday, December 20, 2015

Benefits of Exfoliating

We all know that the dry, cold months are quickly approaching, even if we don't appreciate them. I am taking this opportunity to share with you, the benefits of exfoliating!

Now if you are unsure of what I mean by exfoliating, exfoliation involves the removal of the oldest dead skin cells on the skin's outermost surface. This can be done many ways, for example; a body or face scrub, a facial or chemical peel or manually with a dry brush. Exfoliating is very helpful all year round but today, I am going to share why it is so important during the cool months ahead of us. 


1. Absorption of other products


By removing off the dead skin cells, the fresh subtle skin is exposed. Therefore, your oils and creams that you would apply after your bath or shower, can really soak in and absorb into the skin. This allows you to get the full benefits of the moisturisers as well.   

2. Shaving = 100000 times better 

Using a body scrub prior to shaving your legs can do wonders. This ensures a closer shave to the root of the hair, which will lengthen the regrowth time of the hair. It also makes your legs super smooth and shiny before a big event, for example; a holiday party. 


3. Get a more even fake tan

Many of us still want that bronze goddess look all year round, exfoliating before self tanning will ensure your product will go on smoothly. This prevents any blotchy patches or product built up on the skin.

4. Preventing acne

Including a face scrub is essential when it comes to a beauty routine. Exfoliating of the face will unclog pores to really clean the out and prevent blackheads. 

5. Smoother makeup application

Scrubbing off the dead skin cells on your face can also make a soft smooth canvas for your makeup to be applied onto. This will prevent your foundation, concealer and other face makeup from looking cakey on the face, 

Sunday, November 1, 2015

My Mac Eyeshadow Quad: Fall 2015

Hey guys! Today I would love to share my new Mac eyeshadow quad with you all. Showing my eyeshadows from Mac is one of my number one requested post from you guys!

I recently picked up a little quad for four of my shadows and I thought this was the perfect time to share them with you.

So as many of you know, from reading previous posts, I do own a 15 shadow palette from Mac. This was a lovely gift from my sister last Christmas and I love all the options I get when I grab for that palette. That being said, it is quite inconvenient to travel with such a large palette so I decided to grab a quad for travel purposes.


The first shadow I have in my quad is Blanc Type. This is a creamy, matte, off white colour that is great to highlight. It is super pigmented and I use it under my brows everyday.

The second shade I have is All That Glitters. This is the perfect champagne lid shade that adds shimmer to a look but not too much sparkle. This is my go-to lid colour.

For my transition shade, I put in Soft Brown. This is a matte warm toned brown which is perfect in the crease. I use it to blend out shadows and it's warm undertones are great for this season.

The final colour I have in my little palette is Sable. This is a shimmery brown with a red/cranberry sheen to it. I love this shade for my outer corner, or if I'm feeling vampy, I'll wear it all over the lid!

Sunday, October 11, 2015

Summer to Fall: Makeup Tips

Blackened Plum Lip Colour:
Colour for the bolder of us :) 
Hello everyone! Long time no type. Along with the fact that I have been absent for a small period of time, the leaves have also been changing in that period of time to. We all know that changing leaves = autumn = changing makeup!!

Personally, I adore the deep, dark, vampy colours of fall time makeup/fashion, but like many, I haven't always been as comfortable rocking them in public. Today, I have a few recommendations on how to change up your look for the changing seasons, as well as where to start when trying dark colours.


Berry/Pink Lip Colour:
Easier to wear!

Now we pretty much all know, the most common "change" is the deep, vampy lip colours. Either it's a lip stain, liner or traditional lip stick, every makeup company has dark lip colours to choose from. My first tip for beginners is to either start with a tinted lip balm or apply a very sheer layer of the lip product, versus building it up. Another option would be to choose a more berry/pink shade compared to a almost black purple/cherry colour.


Another easy change is the eyeshadows you wear! For example, choosing more warm toned browns in the crease and orangey, copper shades on the lid make for a festive but wearable look. You can also deepen up the outer corner of the eyes with dark shadow or smudge a little shadow underneath the lashline as well.


Also, don't forget the classic cat eye!

Monday, September 7, 2015

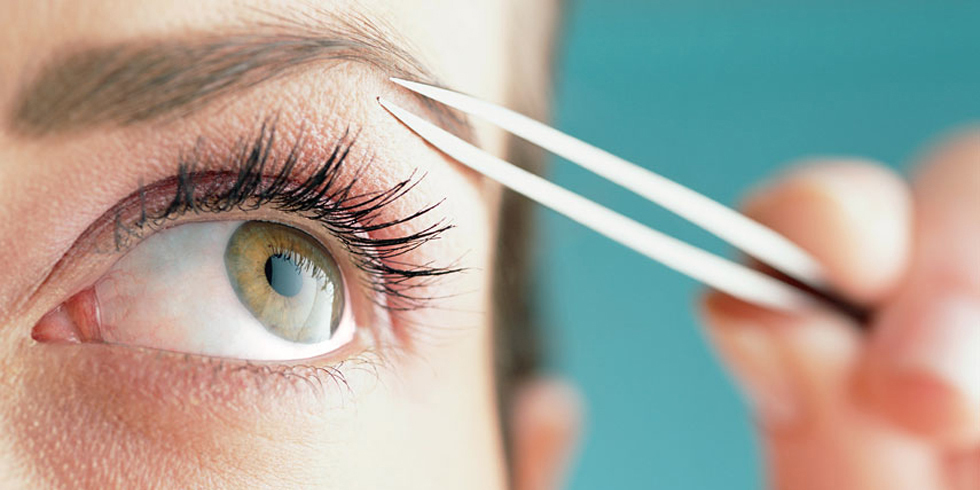
How to: Make Eyebrow Tweezing Less Painful

Hey guys! A question I get asked quite frequently is how to make the daunting task of tweezing your brows, hurt less.
Personally, I have been tweezing/waxing my eyebrows since I can remember. I was unfortunately blessed with a lovely dark brown unibrow at the age of 9 and believe me, it was waxed off by the time I was 10. I'd like to thank my mom for not letting me face the world with a caterpillar between my brows for too long. That being said, eyebrow hair removing can be a painful task and today I am going to share four tips to help ease the pain. 

Tweeze right after a shower! The warmth and steam really helps to open up your pores so the hairs will slide right out when tweezing. If you are in a pinch numbing the skin with ice is also a option in a time crunch.

Tweeze in the direction that you hair is growing. This also helps with allowing the hair to slide out better. It also will prevent ingrown hairs.. yes believe it or not, they are possible around your brows.. YIKES!

Another important step to pull your skin taught when tweezing your eyebrows. This will help ease the pain and you can also apply pressure to the area after plucking out the hair. Gently pulling your skin taught will also prevent you accidentally plucking at your skin. Ouch!  

The final tip is to always use sharp, slanted tweezers. This will result in easy grabbing of the hairs without nicking your skin. You can also flip the slanted tweezers around to use the pointy end to really get in there for the stubborn baby hairs. Those are the worst! 


Thanks for reading guys! Leave me comment down below with your embarrassing eyebrow stories! 
~Mademoiselle Maquillage xoxo 

Saturday, August 8, 2015

My Thoughts on the "No Makeup, Makeup Tutorial"

covering up acne 
Beauty videos on YouTube have essentially taken over the beauty community. Either it's a product review, collection video or a haul, YouTube is the most popular community for learning all about makeup. The most popular type of videos being tutorials, where you can learn how to apply makeup on yourself and others.

I, myself have a special place in my heart for makeup videos. Nothing like curling up in bed on a Friday night watching "MakeupByTiffanyD" or "emilynoel83" blend out a sexy smoky eye. For that reason, I LOVE makeup videos, just girls like you or me, sharing their amazing talent of makeup.


changing facial features is not "natural" 
Lately, a new popular video has become one of the top searched makeup videos on YouTube; "The No Makeup, Makeup Look". This is where the "beauty gurus" on YouTube film a video tutorial about how to apply makeup to look like you aren't wearing any. They start the video off with "This is a natural look, perfect for a simple date or even just going to the grocery store." 

In my opinion, this "Makeup Look" is really just hiding your natural beauty. A lot of people wear makeup to hide or change their features, but when you are so unhappy with yourself that you can't go barefaced to the grocery store... that is an issue. Nothing is natural about false lashes and contoured cheek bones. 

I think this video needs to be called something else. What about "Simple Day Time Glam"? Something that doesn`t hide that fact that we are still wearing makeup, and essentially just hiding ourselves.

Talk to you guys soon!
~Mademoiselle Maquillage xoxo 

Wednesday, July 15, 2015

Strobing 101

What the heck is strobing!?! After just mastering how to slim down our face by contouring, makeup trends take a sharp turn and contouring is out the window for this summer. But let me tell you ladies and gentlemen, highlighting is here to stay!
Strobing is the new fancy word for highlighting... but like highlighting on steroids. This is perfect for summer since glowing, bronzed skin looks most natural. 

Some points on the face to highlight to achieve strobing are:
  • bridge of the nose
  • top of the cheekbones
  • under the bottom lip
  • cupids bow (above upper lip)
  • center of the forehead 
  • under the brow bone 
This look can be achieved with cream products if you have dry skin and powder products if you have oily skin. Anything that is a light shimmery shade that will reflect light is perfect! 

Happy Strobing! <3

Talk to you guys soon!
~Mademoiselle Maquillage xoxo 

Tuesday, December 30, 2014

How To: Depot Mac Blushes


Hello Everyone! Today I will be showing you how to depot your Mac Blushes. For Christmas, my sister got me a palette from Mac so I could transfer my blushes in the compacts, over to a sleek, travel friendly palette. 
I started off with my regular blush from Mac in the little pot. I used a pairing knife and wedged it right in between the black part and the purple part as you can see. I used a limited edition blush here so you can see the demo better with the purple and the black, compared to Mac's standard, just black.  


 I just wiggle my knife back and forth a bit in the space there and it will lift out and pop right out.


After that, I take the little part that popped out and I set it on my flat iron on a piece of wax paper, or parchment paper, it doesn't matter. I leave it on my flat iron for a few minutes. 


 While that is doing it's thing, I cut out some circles on a sheet of adhesive magnetic tape. You need this to put on the back of the pan afterwards so it will stick in your palette.

When you are waiting for the pan on the flat iron, you will know when it is ready. You can pull it off and you will see a little ring forming in the center on the bottom. That is where the plastic has started melting.

All you have to do is pop your pairing knife in the center and push. If you have a hard time, put it back on the iron to heat up again but the pan should be pushing out from the other side by now. 


BE CAREFUL!!! The pan is VERY hot and you can burn yourself very easily. I just push it, pop it out and let it cool off on another piece of wax paper. 

Next we want to get the sticker off the back of the compact so you know what shade of blush you have. 


I just simply hold the compact on the iron for a few seconds and it melts the glue a little bit for me. Then you can just peel it back. 

I then place the sticker from the original blush compact onto the magnetic side of the magnet paper circle. 

Then you can stick the circle onto the back of your blush pan and you are good to go!

Sunday, December 7, 2014

Must Have Makeup Brushes (Blogmas Day 7)

Hey guys! Today we will be talking makeup brushes!! These little babies often are forgotten about but they are one the most important things used when applying makeup. Lot's of makeup can be applied with our hands but brushes can create a more flawless, professional look overall. To be honest, they just make me feel pro too heehee :)


To start, face brushes! A makeup look isn't anything without a perfect base so face makeup is where it's at! For foundation, I love using my Real Techniques All Over Face Brush. It is a super dense brush that is great for really buffing in the product. It has stubby bristles that are synthetic which is good because it won't absorb product.

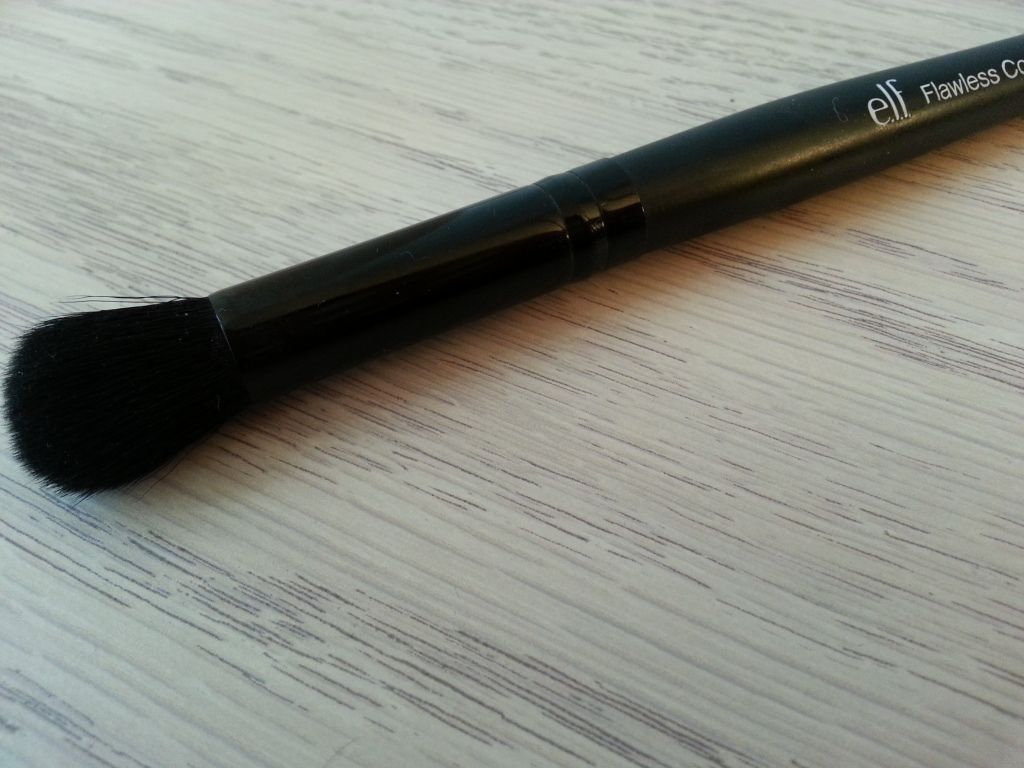
For concealer, I use the ELF Flawless Concealer Brush. This is great for buffing out the concealer under my eyes and I also use this to apply powder under my eyes to set the concealer. P.s. This brush is a good crease brush for eyeshadow too

Real Techniques Blush Brush is my #1 for blush, bronzer and highlighter. It is big enough to blend out product but small in the sense that it keep the product controlled.

For eyes, I have my 3 main brushes I adore. First up is the ELF Eyeshadow "C" Brush. A super dense brush like this is a dream to use when packing colour on the lid. For blending the crease, I like the Eco Tools Airbrush Concealer Brush. It is super affordable and actually does a good job at blending shadows in the crease. Lastly, for the brow highlight, I like the Eco Tools Shadow Brush. It is a flat shader brush but it kind of comes to a point at the top so you can precisely place your brow bone colour.

Monday, November 3, 2014

My MAC Blush Collection


Hello everyone! Today I wanted to share my Mac blush collection with you guys! These are a product I have been collecting for a few years now and I want to show you which ones I have and which ones are my faves! 


Crazed Imagination
Crazed Imagination was just launched with the Rocky Horror Picture Show Collection in October. It is a deep plum brown type colour that is great for creating a deep, sultry fall look. usuing a light hand with this product creates the best look and this is the newest edition to my Mac blush collection.
Rosy Outlook
Rosy Outlook is a Prolongwear Blush. It is made to last all day and give good pigmentation that stays. It is a super pretty rosy peach colour and the texture is super smooth and soft.

Well Dressed
Well Dressed was my very first Mac Blush. I bought it about 2 years ago and as you can see by the package, it has been very well loved. It is a super pretty cool toned light baby pink that is great for beginners or someone who likes a natural look.

Love Cloud
Love Cloud is one of my faves! I purchased it at the CCO when I went to the states in the Spring time this past year. It is a beauty! It gives a great pop of pink on the cheeks which I think looks great all year round. The flush it gives is super healthy looking and I have been using it a lot lately.

Cheeky Bugger 
Cheeky Bugger, what a cute name! This was released in the Kelly Osbourne collection a little while back and it is so pretty. Similar to Rosy Outlook it is a rosy peach colour but this shade leans more pink than peach. This is one of those blushes that go great with any kind of look. 

So that is my collection! I think it is a great size and I only have one blush on my wishlist. Breezy Blush from Mac has somehow found it's way onto my ongoing Mac Wishlist so let me know if you have tried it before! 

Saturday, October 25, 2014

My Makeup In the Future

Hello everyone! By the time you are reading this post, I am moving!! How exciting?! (and stressful) It hasn't been until now in my life that I realized how much junk I have! Coming soon I will have a blog post all about my purge.. my makeup :( It was super tough for me but with the move, it had to be done.

There are a few things I wanted to address in this post, the first one being my personal style change. When I cleaned out my makeup, I realized how I don't need 6 blushes and 7 foundations. Or 5 mascaras on the go at once and that glittery purple eyeliner from years ago. My desire used to be to have this huge makeup collection that filled a "makeup room" that would be all mine. That dream has changed to now wanting to just have my all time, holy grail products. There is nothing wrong with splurging or spending a little bit on new exciting makeup here and there but I want to narrow down my collection to my necessities.

This change may result in a bit of a change on my blog. Since I will be narrowing my collection down to just my faves, I won't be needing to do a monthy favourites because I will be trying a lot less makeup out. I think it is only fair to keep up with posting a review every Tuesday because those are my favourite posts to make for you guys. I think I have tried enough makeup in my lifetime so far to have enough products to talk about.

Another point I'd like to touch on is that, in the future, I would LOVE to become a freelance makeup artist. As a student right now, I don't really have that option but when all my schooling is done, my goal is to be something in the beauty industry. At first, I always thought I wanted to be a teacher but now that I have been exposed to the makeup world much more, my dreams have changed. I keep telling myself that I could be 'teacher by day, makeup artist by night (and weekend)' hehe :) who knows where life will take me!

Let me know down below what your makeup style is! Do you have your faves and a few fun items? Or do you have a large collection of everything?

Thursday, October 23, 2014

Makeup Wishlist


So as you may know, tons and tons of new makeup sets are coming out just in time for the holidays! This of course, is an makeup junkies dream and I have made up quite a large list of makeup I would like to receive for Christmas this year. Some items are from the holiday collections, others are permanent.


Tarte Lights, Camera, Splashes Waterproof Mascara: hoping that this will hold my curl. The packaging is also, so dang cute!


Urban Decay Naked 2 Basics Palette: I love the first one and I adore cool toned shades.


Mac Pro Longwear Concealer: looking forward to full coverage and crease free concealer!


Mac Heirloom Holiday Blushes: both are mineralized and look gorgeous!


Sunday, October 19, 2014

Wet n' Wild New Beauty App?!?


So Wet n' Wild has come out with an official app! You can download it for free from the Google Play Store or the App Store on any of your devices. Here is what inspired their app;


For the first time in the brand's 35-year history, Wet n Wild is rolling out a national campaign called "Steal the Look." Based on the insight that women look to makeup for transformation, empowerment and play, the brand is set to help women lift any look they love—from a high-fashion cover model to a friend down the block—and re-create it for less. 
"This incredible moment is more than 35 years in the making for wet n wild," said Bill George, president and COO of Markwins International, which owns the value cosmetics brand. "Wet n wild has always had a brilliant and beloved collection of trend-setting colors at the right price point—and now this brand campaign gives us a bold dose of moxie, making us an unstoppable force in the beauty marketplace."

I will be downloading the app myself but let me know what you guys think! I would love to hear your thoughts down below!

Sunday, October 12, 2014

Mac Eyeshadow Wishlist

Hey guys! Today I wanted to share my wishlist with you all for mac eyeshadows. Right now, I store them in the large 15 pan Mac Eyeshadow palette and this is working quite well for me but I only have four slots left in the little insert.. and as you will soon see I have WAY more than 4 on my to buy list. My plan is to pop out the little insert and just place the metal eyeshadow pan right in the palette. That way I can store 27 instead of 15.

Below I have listed the shade name and then the finish of the shadow itself:


  • Soft Brown (Matte)
  • Copperplate (Matte2)
  • Knight Divine (Veluxe Pearl)
  • Electra (Frost)
  • Cranberry (Frost)
  • Shroom (Satin)
  • Vex (Frost)
  • Blanc Type (Matte2)


  • Soft Brown

    Copperplate

    Knight Divine

    Electra

    Cranberry

    Shroom
Vex

Blanc Type


Let me know in the comments below what eyeshadows from Mac you recommend? Is there some you think that I MUST have?